把处理器设计跑起来
伯克利IEEE Micro论文的开源SoC框架,从Rocket仿真到Genesys2 FPGA原型。整理固定源码版本、原厂套装BOM、图解步骤和许可边界,并核查台湾师大、TU/e其他团队的实际FPGA实现证据。
alan000
IEEE Micro 2020
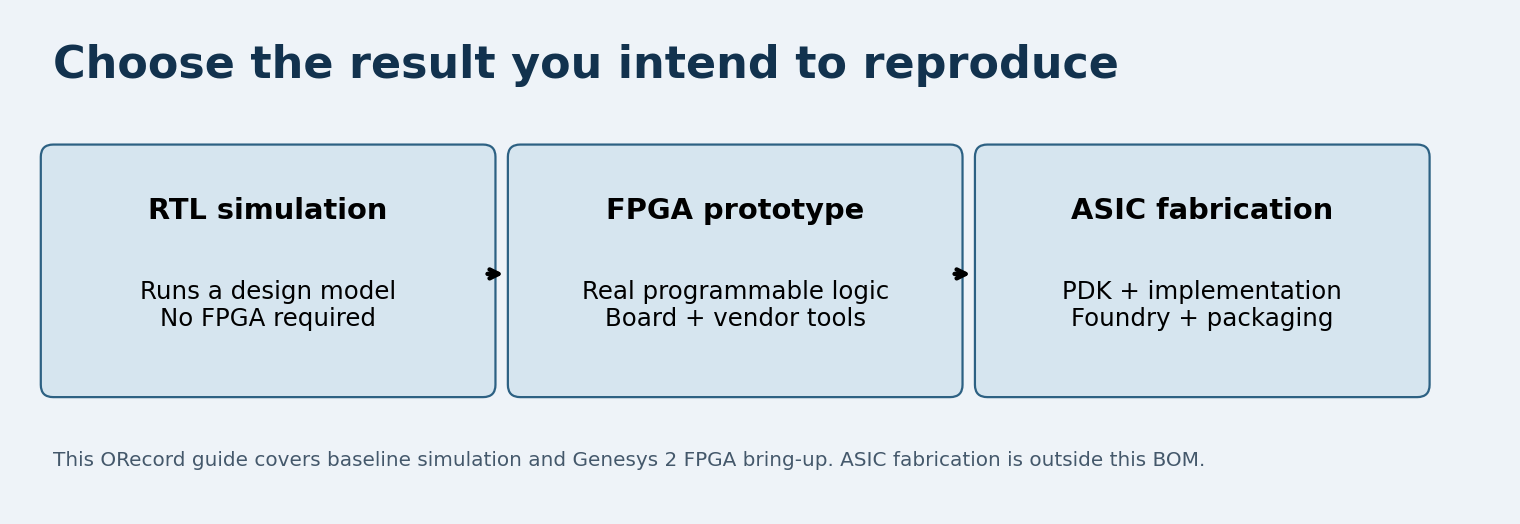
准备x86 Linux主机、足够磁盘空间和支持XC7K325T的Vivado许可,先限定为Rocket仿真与Genesys2位流。
1. 核对系统、磁盘及器件授权;Windows先确认WSL/USB转发方案。
2. 没有Vivado器件授权时先停在软件仿真阶段。
3. 检查结果:主机具备上游构建环境,许可覆盖XC7K325T。
[固定版本安装原文](https://github.com/ucb-bar/chipyard/blob/371ab92dd09917b6ab05d58bf762b173c52f4224/docs/Chipyard-Basics/Initial-Repo-Setup.rst) · [Genesys2原教程](https://github.com/ucb-bar/chipyard/blob/371ab92dd09917b6ab05d58bf762b173c52f4224/docs/Prototyping/Genesys2.rst) · [原厂板卡手册](https://digilent.com/reference/programmable-logic/genesys-2/reference-manual)
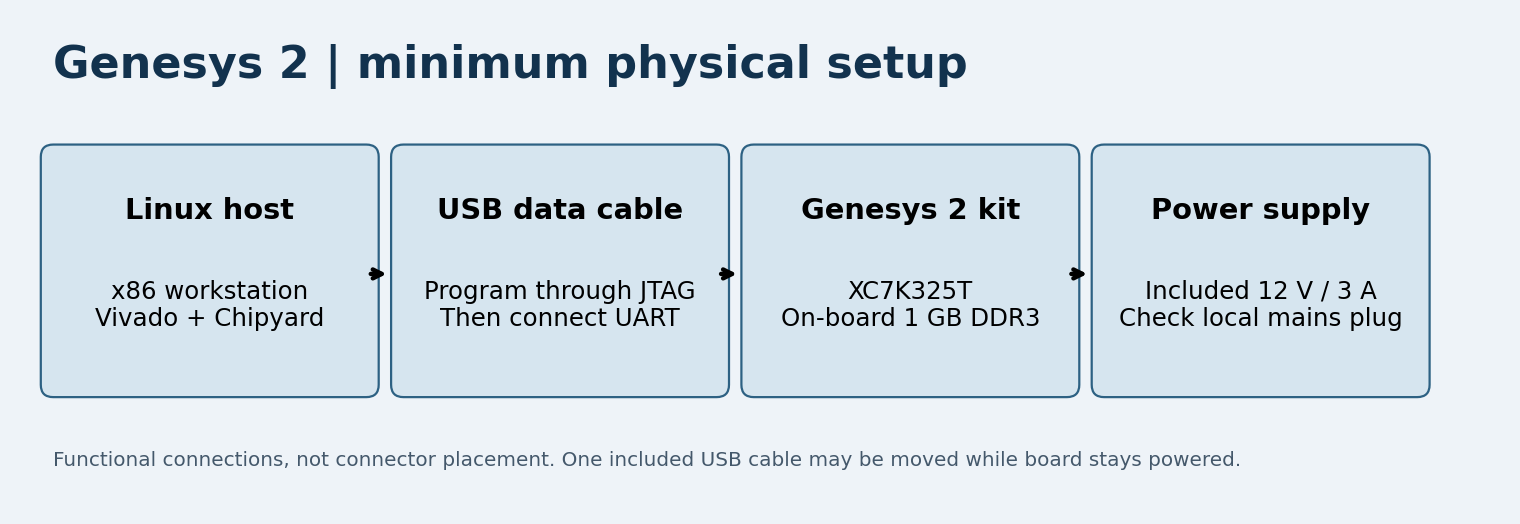
先确认板卡型号和接口,避免将UART、JTAG与供电口混接。
1. 按Digilent手册核对型号、电源入口、编程USB口与UART接口标记。
2. 断电连接线缆;固定电源接口的极性和额定值只按板卡手册确认。
3. 检查结果:实物标识与手册对应。
[固定版本安装原文](https://github.com/ucb-bar/chipyard/blob/371ab92dd09917b6ab05d58bf762b173c52f4224/docs/Chipyard-Basics/Initial-Repo-Setup.rst) · [Genesys2原教程](https://github.com/ucb-bar/chipyard/blob/371ab92dd09917b6ab05d58bf762b173c52f4224/docs/Prototyping/Genesys2.rst) · [原厂板卡手册](https://digilent.com/reference/programmable-logic/genesys-2/reference-manual)

Genesys2使用XC7K325T;先确认Vivado版本和许可覆盖目标器件。
1. 检查许可管理工具中的器件授权状态。
2. 安装Vivado与板卡线缆驱动并记下版本。
3. 检查结果:Vivado启动且XC7K325T授权有效。记录实际使用的 Vivado 版本及许可证。
[固定版本安装原文](https://github.com/ucb-bar/chipyard/blob/371ab92dd09917b6ab05d58bf762b173c52f4224/docs/Chipyard-Basics/Initial-Repo-Setup.rst) · [Genesys2原教程](https://github.com/ucb-bar/chipyard/blob/371ab92dd09917b6ab05d58bf762b173c52f4224/docs/Prototyping/Genesys2.rst) · [原厂板卡手册](https://digilent.com/reference/programmable-logic/genesys-2/reference-manual)

[Chipyard仓库](https://github.com/ucb-bar/chipyard) · 固定到本教程使用的提交,此后命令均在同一工作树运行。
1. 安装Git和官方文档要求的Miniforge/Conda。
2. 在终端运行:
```
git clone https://github.com/ucb-bar/chipyard.git
cd chipyard
git checkout 371ab92dd09917b6ab05d58bf762b173c52f4224
./build-setup.sh riscv-tools
source ./env.sh
```
3. 确认命令成功并检查`git submodule status`;每次新终端都从仓库根运行`source ./env.sh`。
4. 检查结果:所需工具链和提交指定的子模块就绪,保留安装日志。
[固定版本安装原文](https://github.com/ucb-bar/chipyard/blob/371ab92dd09917b6ab05d58bf762b173c52f4224/docs/Chipyard-Basics/Initial-Repo-Setup.rst) · [Genesys2原教程](https://github.com/ucb-bar/chipyard/blob/371ab92dd09917b6ab05d58bf762b173c52f4224/docs/Prototyping/Genesys2.rst) · [原厂板卡手册](https://digilent.com/reference/programmable-logic/genesys-2/reference-manual)

构建Verilator仿真器,再运行RISC-V测试,确认编译之后程序确实执行。
1. 加载`env.sh`后进入`sims/verilator`,运行`make`。
2. 运行`make run-binary BINARY=$RISCV/riscv64-unknown-elf/share/riscv-tests/isa/rv64ui-p-simple`。
3. 核对命令退出状态和测试输出;仅编译成功不算通过。
4. 检查结果:测试程序执行完成并返回成功状态。
[固定版本RTL仿真指南](https://github.com/ucb-bar/chipyard/blob/371ab92dd09917b6ab05d58bf762b173c52f4224/docs/Simulation/Software-RTL-Simulation.rst)
[固定版本安装原文](https://github.com/ucb-bar/chipyard/blob/371ab92dd09917b6ab05d58bf762b173c52f4224/docs/Chipyard-Basics/Initial-Repo-Setup.rst) · [Genesys2原教程](https://github.com/ucb-bar/chipyard/blob/371ab92dd09917b6ab05d58bf762b173c52f4224/docs/Prototyping/Genesys2.rst) · [原厂板卡手册](https://digilent.com/reference/programmable-logic/genesys-2/reference-manual)
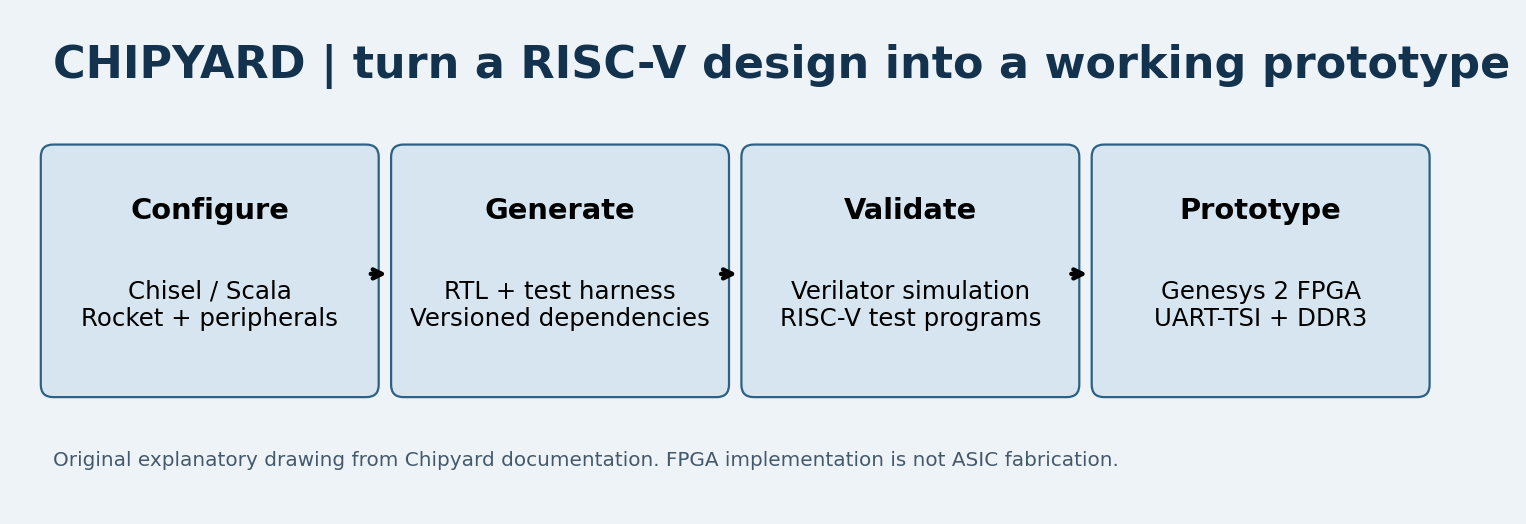
用仓库hello示例测试ELF加载;需要跟踪信号时再生成VCD。
1. 从仓库根按`tests/README.md`运行`cmake -S tests -B tests/build -D CMAKE_BUILD_TYPE=Debug`,再运行`cmake --build tests/build --target hello`生成`tests/build/hello.riscv`。随后进入`sims/verilator`运行`make run-binary BINARY=../../tests/build/hello.riscv`并核对输出。
2. 要查看波形时,运行`make debug`和`make run-binary-debug BINARY=../../tests/build/hello.riscv`,用VCD查看器打开文件。
3. 检查结果:hello输出可见;调试时生成VCD文件。
[固定版本tests/README.md](https://github.com/ucb-bar/chipyard/blob/371ab92dd09917b6ab05d58bf762b173c52f4224/tests/README.md) · [固定版本RTL仿真指南](https://github.com/ucb-bar/chipyard/blob/371ab92dd09917b6ab05d58bf762b173c52f4224/docs/Simulation/Software-RTL-Simulation.rst)
[固定版本安装原文](https://github.com/ucb-bar/chipyard/blob/371ab92dd09917b6ab05d58bf762b173c52f4224/docs/Chipyard-Basics/Initial-Repo-Setup.rst) · [Genesys2原教程](https://github.com/ucb-bar/chipyard/blob/371ab92dd09917b6ab05d58bf762b173c52f4224/docs/Prototyping/Genesys2.rst) · [原厂板卡手册](https://digilent.com/reference/programmable-logic/genesys-2/reference-manual)

用FPGA子项目生成位流,并检查Vivado实现结果。
1. 从仓库根进入`fpga`。
2. 运行`make SUB_PROJECT=genesys2 bitstream`。
3. 检查实现日志、时序报告和生成的`.bit`文件;50 MHz是设计目标,必须以时序报告判断约束是否通过。
4. 检查结果:位流生成且时序状态有记录。
[固定版本安装原文](https://github.com/ucb-bar/chipyard/blob/371ab92dd09917b6ab05d58bf762b173c52f4224/docs/Chipyard-Basics/Initial-Repo-Setup.rst) · [Genesys2原教程](https://github.com/ucb-bar/chipyard/blob/371ab92dd09917b6ab05d58bf762b173c52f4224/docs/Prototyping/Genesys2.rst) · [原厂板卡手册](https://digilent.com/reference/programmable-logic/genesys-2/reference-manual)

把本次位流加载到Genesys2的易失配置存储器。
1. 按Digilent手册连接额定电源和编程USB口并上电。
2. 在Vivado Hardware Manager连接目标,确认器件为XC7K325T,选择生成的`.bit`并执行Program Device。
3. 检查结果:Vivado报告编程完成;断电后配置会消失,本流程不写配置闪存。
若未识别器件,检查线缆、驱动、供电和型号,不要试改电压。
[固定版本安装原文](https://github.com/ucb-bar/chipyard/blob/371ab92dd09917b6ab05d58bf762b173c52f4224/docs/Chipyard-Basics/Initial-Repo-Setup.rst) · [Genesys2原教程](https://github.com/ucb-bar/chipyard/blob/371ab92dd09917b6ab05d58bf762b173c52f4224/docs/Prototyping/Genesys2.rst) · [原厂板卡手册](https://digilent.com/reference/programmable-logic/genesys-2/reference-manual)

生成UART-TSI程序并确认串口连接正确。
1. 从仓库根进入`generators/testchipip/uart_tsi`并运行`make`。
2. 将USB线接板载UART口,在系统设备列表中确认实际端口名。
3. Linux端口常形如`/dev/ttyUSBX`,以本机枚举值替换X,并确认未接到JTAG口。
4. 检查结果:目录生成`uart_tsi`可执行文件且系统识别串口。
[固定版本安装原文](https://github.com/ucb-bar/chipyard/blob/371ab92dd09917b6ab05d58bf762b173c52f4224/docs/Chipyard-Basics/Initial-Repo-Setup.rst) · [Genesys2原教程](https://github.com/ucb-bar/chipyard/blob/371ab92dd09917b6ab05d58bf762b173c52f4224/docs/Prototyping/Genesys2.rst) · [原厂板卡手册](https://digilent.com/reference/programmable-logic/genesys-2/reference-manual)

通过UART-TSI加载兼容的RISC-V ELF,区分通信自检和程序本身的结果。
1. 在`uart_tsi`目录运行`./uart_tsi +tty=/dev/ttyUSBX +selfcheck <ELF路径>`,替换端口和路径;上游示例为`dhrystone.riscv`。
2. 检查自检输出,再检查程序自己的执行结果;自检通过只说明加载/串口检查通过。
3. 完成后保存提交、子模块版本、Vivado版本、配置名、时序报告和UART输出。
上游还列出指定地址读写示例;它不是入门检查所需操作,不要照抄任意地址写入。
[固定版本安装原文](https://github.com/ucb-bar/chipyard/blob/371ab92dd09917b6ab05d58bf762b173c52f4224/docs/Chipyard-Basics/Initial-Repo-Setup.rst) · [Genesys2原教程](https://github.com/ucb-bar/chipyard/blob/371ab92dd09917b6ab05d58bf762b173c52f4224/docs/Prototyping/Genesys2.rst) · [原厂板卡手册](https://digilent.com/reference/programmable-logic/genesys-2/reference-manual)
